Ethereum Dapp 开发 (3) - 智能合约测试(Remix IDE)
Updated:
我们在前面一篇说到,智能合约发布后就没法修改了。所以,在真正发布前,我们必须进行详细的测试。那智能合约怎么测试呢?难不成我们自己要部署一个自己的 Ethereum 网络节点?
这篇文章,我先介绍一种最简单直接的测试方式。
完整合约代码
上一篇教程完成后,智能合约的完整代码应该是这样的。
1 | pragma solidity ^0.4.18; |
Remix IDE
Remix IDE 是一个在线的智能合约编译,测试和部署工具。使用它可以很方便的和智能合约交互,虽然有些地方不是那么便利。
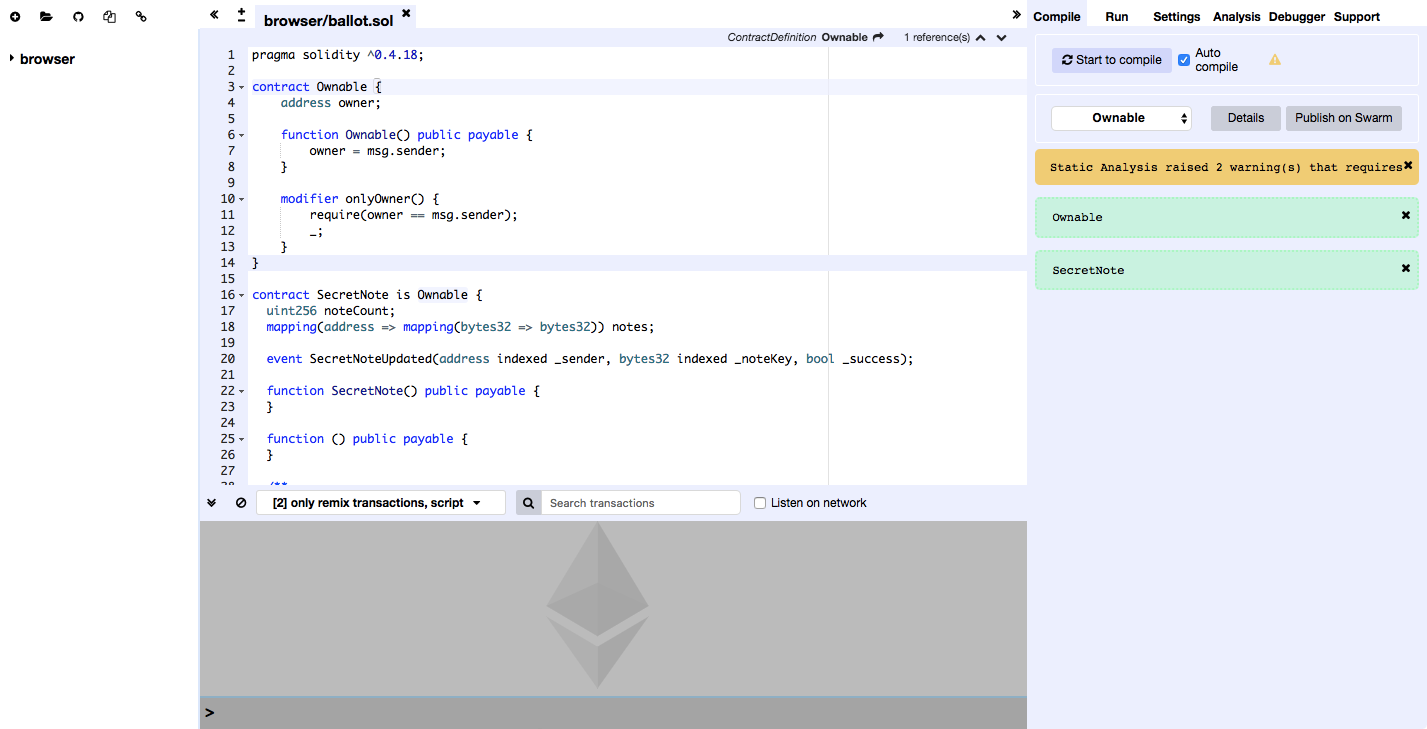
合约编译检查
当我们打开 Remix 的页面,把我们的智能合约代码贴进去的时候,它已经会自动帮你编译代码。右侧是主要的操作区。它有好几个功能标签。Compile 标签会显示出编译后有哪些合约,已经它发现的一些 Warning。
合约创建
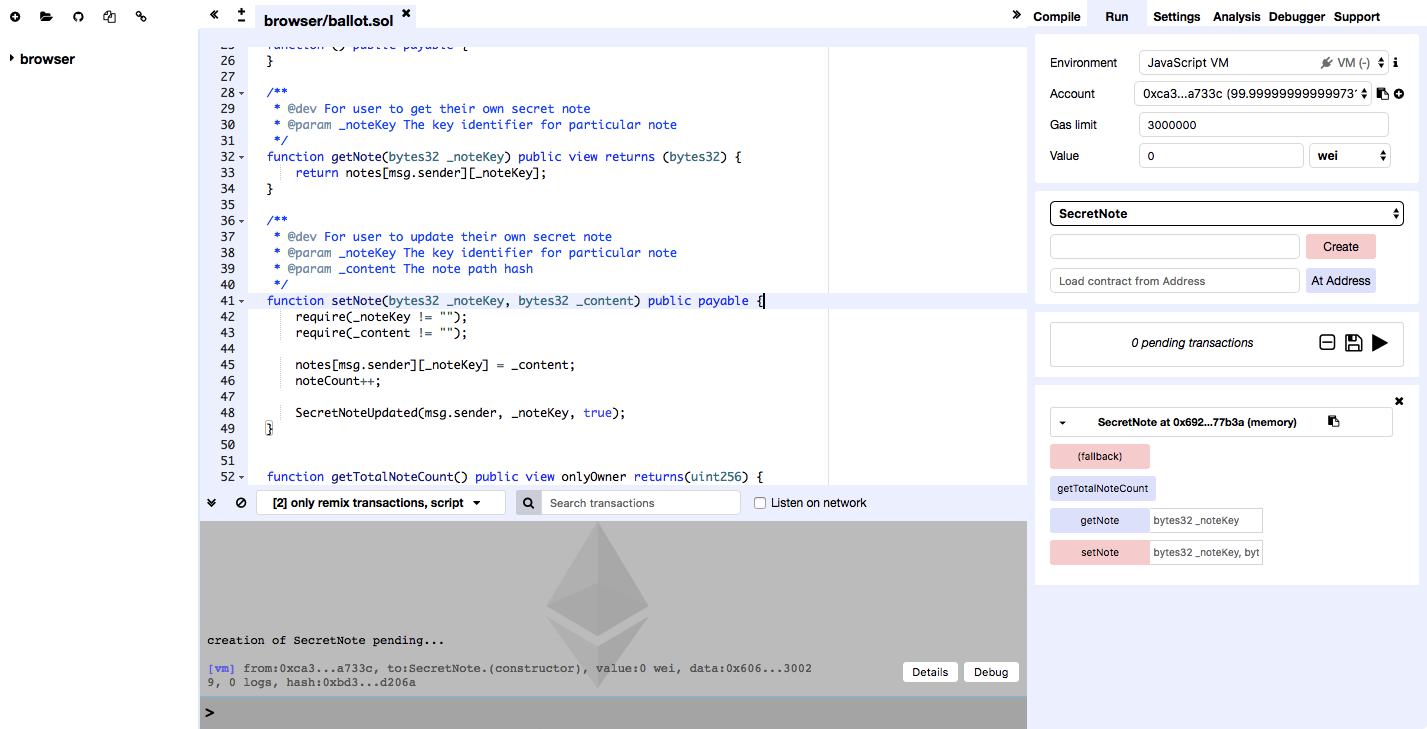
既然编译没有问题,我们点击旁边的 Run 标签看看怎么部署运行这个合约。
- 选择
JavaScript VM这个 Environment。你会发现它马上帮你创建了好几个拥有了 100 eth 的帐号。 - 在合约名字下拉框选择我们将要部署的合约
SecretNote。 - 点击 Create
- 合约就生成了。它的接口
fallback,getTotalNoteCount,getNote,setNote都分别显示出来。 - 因为我们用了默认提供的第一个帐号来创建合约,它的帐号余额已经不是 100 eth 了。
合约调用
合约创建完,我们就可以调用合约提供的对外的接口了,有几点值得留意的是:
- 只读
view的方法,它的名字是蓝色的;其它的方法名字是粉红色的。 - 方法调用时,我们需要用双引号,和逗号把参数分开。
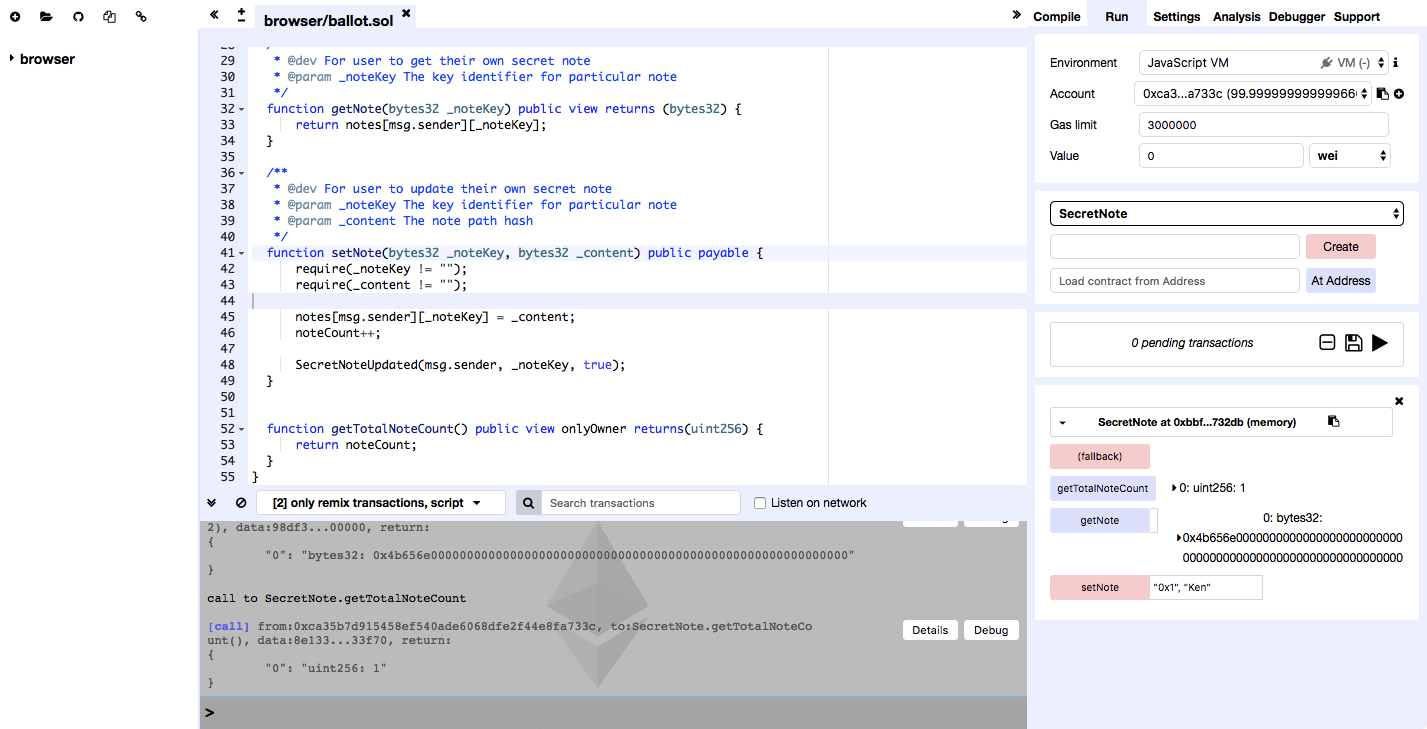
现在我们按 setNote, getNote, getTotalNoteCount 的执行顺序来操作一下。
- 在
setNote旁边的输入框填入:"0x1", "Ken",点击方法名。点完后好像什么都没有发生,但是你在中间的执行日志区可以看到类似的日志:
transact to SecretNote.setNote pending …
[vm] from:0xca3…a733c, to:SecretNote.setNote(bytes32,bytes32) 0xbbf…732db, value:0 wei, data:0x7b7…00000, 1 logs, hash:0xbbe…7df4d
- 在
getNote旁的输入框填入:"0x1",点击方法名。它的右边就会给出这样的显示:
0: bytes32: 0x4b656e0000000000000000000000000000000000000000000000000000000000
因为 Solidity 的 function 是可以有多个返回值的,所以这里显示的是第一个返回值的类型和数值。
- 同样,点击
getTotalNoteCount会返回当前的笔记数量。
0: uint256: 1
现在,我们来看一看如果用另一个帐号(非合约创建帐号),来调用 getTotalNoteCount 会出现什么效果。
- 在
Account下拉框选择另外的一个帐号。这个帐号应该有 100 eth,因为从来没操作过。 - 点击
getTotalNoteCount调用方法。
这时候,你会发现中间的执行日志区出现类似下面的日志。其实,你的操作是失败了的。但是它的报错信息实在是太让人困惑了。
call to SecretNote.getTotalNoteCount errored: VM error: revert.
revert The transaction has been reverted to the initial state.
Note: The constructor should be payable if you send value. Debug the transaction to get more information.
总结
Remix IDE 的基本使用和智能合约的测试就介绍到这里。使用它来测试是比较方便的,你也不用设置什么环境。但是它上面的操作并不是那么灵活,而且是在线工具。
我们能不能像写 JAVA, JavaScript Unit Test 那样来测试智能合约呢?下一篇文章我将介绍 Truffle 这个框架的使用。
相关阅读
Ethereum Dapp 开发 (1) - 什么应放在区块链上
Ethereum Dapp 开发 (2) - 用 Solidity 开发智能合约
Ethereum Dapp 开发 (3) - 智能合约测试(Remix IDE)
Ethereum Dapp 开发 (4) - 智能合约测试(Truffle)
Ethereum Dapp 开发 (5) - 页面开发集成